When building agents with LangChain locally, it’s helpful to visualize what’s happening inside your agent, interact with it in real-time, and debug issues as they occur. LangSmith Studio is a free visual interface for developing and testing your LangChain agents from your local machine.
Studio connects to your locally running agent to show you each step your agent takes: the prompts sent to the model, tool calls and their results, and the final output. You can test different inputs, inspect intermediate states, and iterate on your agent’s behavior without additional code or deployment.
This pages describes how to set up Studio with your local LangChain agent.
Prerequisites
Before you begin, ensure you have the following:
- A LangSmith account: Sign up (for free) or log in at smith.langchain.com.
- A LangSmith API key: Follow the Create an API key guide.
- If you don’t want data traced to LangSmith, set
LANGSMITH_TRACING=false in your application’s .env file. With tracing disabled, no data leaves your local server.
Set up local Agent server
1. Install the LangGraph CLI
The LangGraph CLI provides a local development server (also called Agent Server) that connects your agent to Studio.
# Python >= 3.11 is required.
pip install --upgrade "langgraph-cli[inmem]"
2. Prepare your agent
If you already have a LangChain agent, you can use it directly. This example uses a simple email agent:
from langchain.agents import create_agent
def send_email(to: str, subject: str, body: str):
"""Send an email"""
email = {
"to": to,
"subject": subject,
"body": body
}
# ... email sending logic
return f"Email sent to {to}"
agent = create_agent(
"gpt-4o",
tools=[send_email],
system_prompt="You are an email assistant. Always use the send_email tool.",
)
3. Environment variables
Studio requires a LangSmith API key to connect your local agent. Create a .env file in the root of your project and add your API key from LangSmith.
Ensure your .env file is not committed to version control, such as Git.
LANGSMITH_API_KEY=lsv2...
4. Create a LangGraph config file
The LangGraph CLI uses a configuration file to locate your agent and manage dependencies. Create a langgraph.json file in your app’s directory:
{
"dependencies": ["."],
"graphs": {
"agent": "./src/agent.py:agent"
},
"env": ".env"
}
The create_agent function automatically returns a compiled LangGraph graph, which is what the graphs key expects in the configuration file.
At this point, the project structure will look like this:
my-app/
├── src
│ └── agent.py
├── .env
└── langgraph.json
5. Install dependencies
Install your project dependencies from the root directory:
6. View your agent in Studio
Start the development server to connect your agent to Studio:
Safari blocks localhost connections to Studio. To work around this, run the above command with --tunnel to access Studio via a secure tunnel.
Once the server is running, your agent is accessible both via API at http://127.0.0.1:2024 and through the Studio UI at https://smith.langchain.com/studio/?baseUrl=http://127.0.0.1:2024:
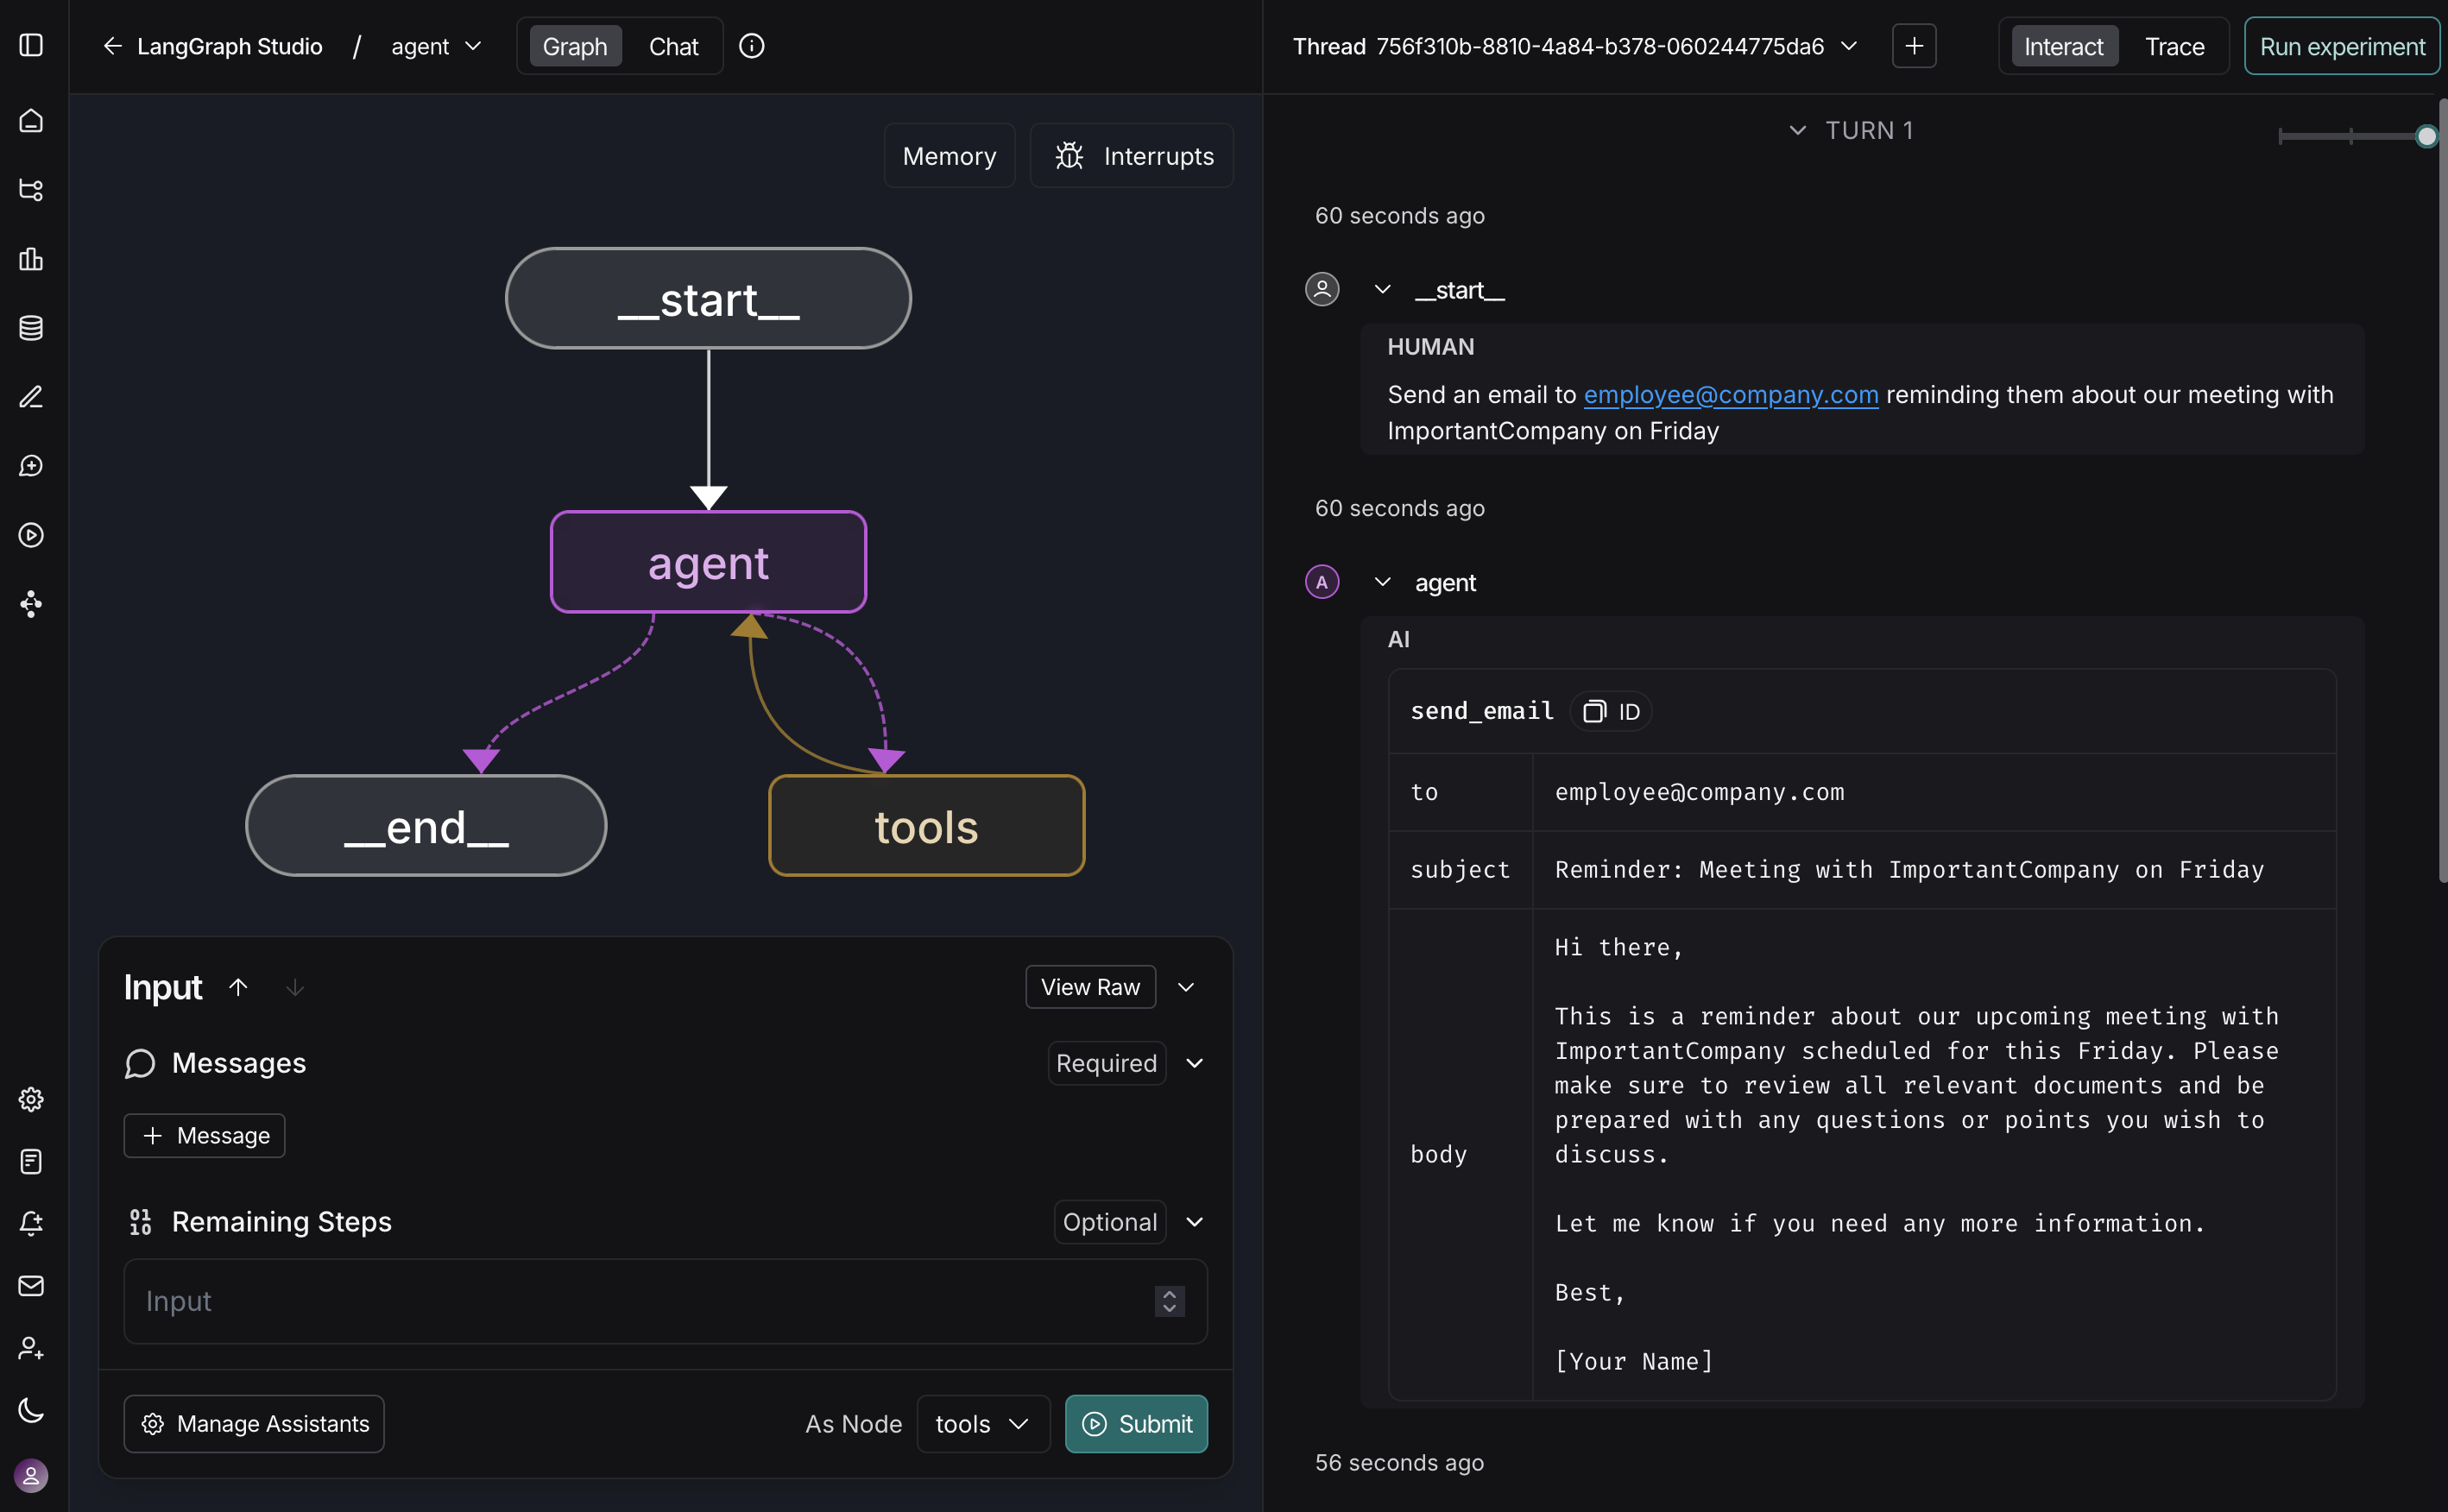
With Studio connected to your local agent, you can iterate quickly on your agent’s behavior. Run a test input, inspect the full execution trace including prompts, tool arguments, return values, and token/latency metrics. When something goes wrong, Studio captures exceptions with the surrounding state to help you understand what happened.
The development server supports hot-reloading—make changes to prompts or tool signatures in your code, and Studio reflects them immediately. Re-run conversation threads from any step to test your changes without starting over. This workflow scales from simple single-tool agents to complex multi-node graphs.
For more information on how to run Studio, refer to the following guides in the LangSmith docs:
Video guide